In the World of Android app development, the size of your Android app matters more than you might think. A smaller app size not only means faster downloads but also saves precious device space while increasing your app’s ranking.
Why? Because users like apps that don’t hog their phone space. Plus, having a small app size is a win for climbing up the ranks on the Google Play Store. Keep it simple, keep it small, and users will love you for it! In this blog post, we’ll explore four simple yet powerful Android Studio techniques to reduce your Android app’s size and make a significant impact.
Tools and Techniques for App Size Reduction
ProGuard
Use ProGuard to shrink and optimize your code to reduce Android app Size in Android Studio. To Enable compression for your app’s resources in Android Studio
aapt2 compile --enable-resource-compression res/ drawable/This will compile the resources in the res/ and drawable/ directories and compress them using the default compression settings. The resulting .flat file will contain the compressed resources, which you can then include in your app.
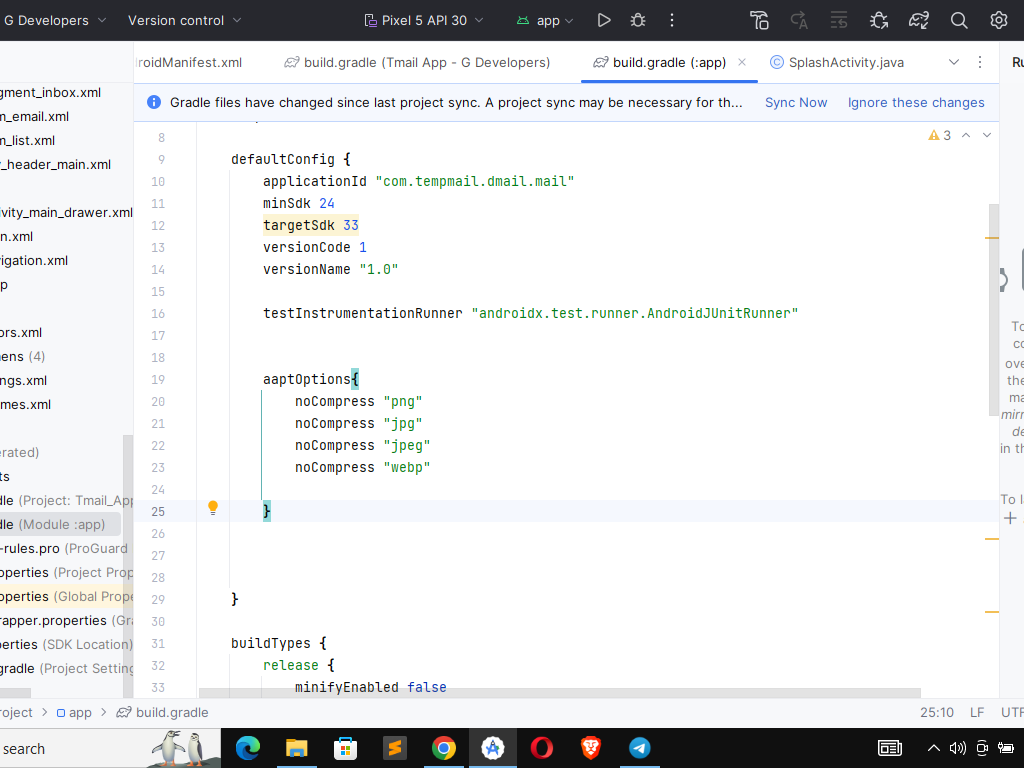
Alternatively, you can enable compression for your app’s resources in the build.gradle file for your app. In the defaultConfig section of the file, you can set the aaptOptions property to enable resource compression. For example:
android {

    defaultConfig {

        aaptOptions {

            noCompress "png"

            noCompress "jpg"

            noCompress "jpeg"

            noCompress "webp"

            noCompress "gif"

        }

    }

}
This will enable resource compression for your app but exclude certain image file types from being compressed (in this example, PNG, JPG, JPEG, WebP, and GIF files). You can adjust the settings and exclude other file types as needed.

Remember that compression can affect the quality of your app’s resources, so it’s important to carefully test the compressed files to ensure they are still acceptable. You may also need to experiment with different compression settings and algorithms to find the right balance between file size and quality.
Use Android App Bundle to Reduce App Size
The Android App Bundle is a publishing format that allows you to package your app’s code and resources into a single file. The Android App Bundle uses advanced algorithms to optimize the size of your app by only including the code and resources needed for a specific device configuration. This can reduce the overall size of your app and improve its performance.
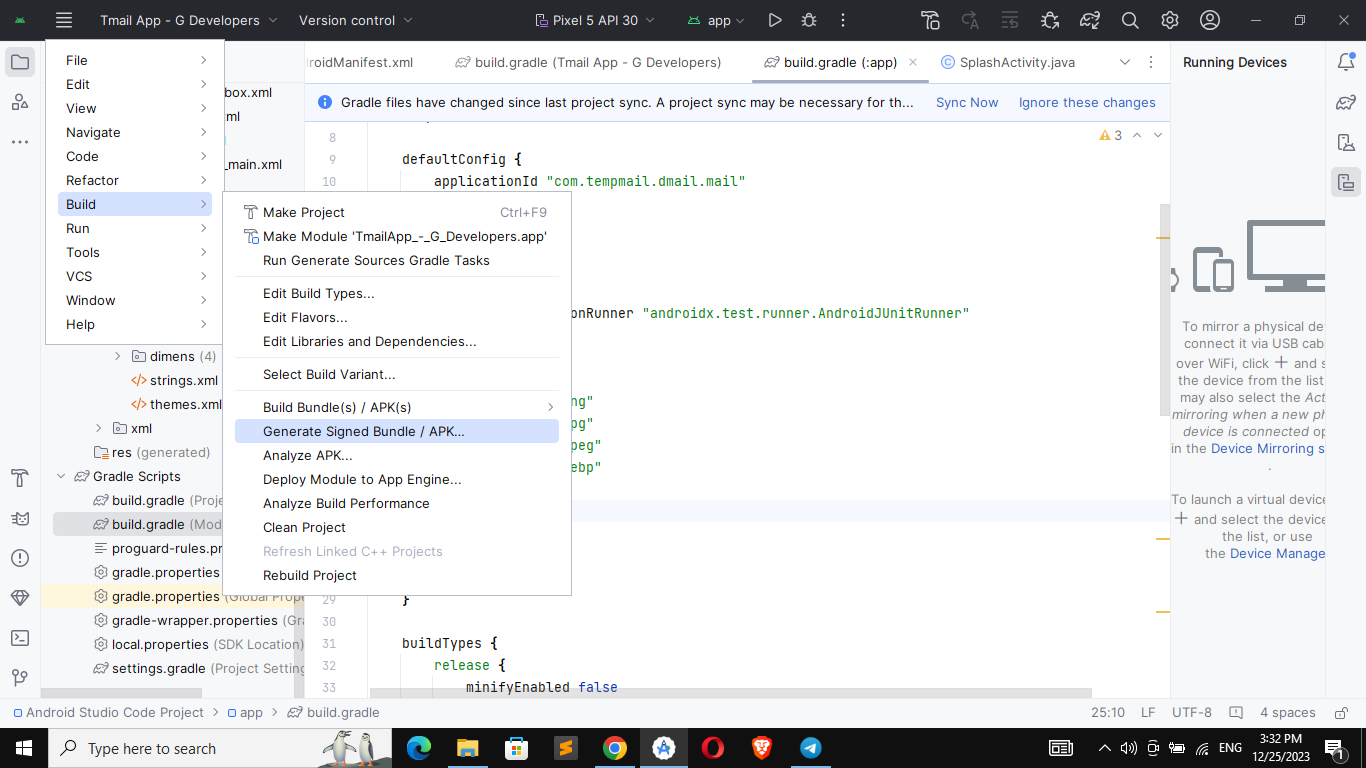
To use the Android App Bundle, you must create a new app bundle from your app’s project in Android Studio. To do this, open your app’s project in Android Studio and select “Build > Build Bundle(s) / APK(s) > Build Bundle(s)” from the menu. This will generate a new app bundle file for your app, which you can then upload to the Google Play Store or distribute through other channels.

Once you have uploaded your app bundle to the Google Play Store, it will generate and serve optimized APKs for different device configurations. This means that users will only download the code and resources relevant to their specific device, which can help reduce the size of your app and improve its performance on their device.
Remember that the Android App Bundle is only available for apps distributed through the Google Play Store. If you are distributing your app through other channels, you will need to use different methods to reduce the size of your app.
Use Low-Resolution Images to Reduce Android App Size
Using lower-resolution images in your Android app can help reduce its size without significantly affecting quality. This is because lower-resolution photos are smaller in size and require less data to be stored and processed, which can help reduce the overall size of your app.
To use lower-resolution images in your Android app, you must first resize the images to a lower resolution. You can use an image editing tool or software like Adobe Photoshop or GIMP to resize the images. When resizing the photos, try to balance the desired image quality with the desired app size. For example, reduce the resolution of your images by 50% or 75%, depending on your specific needs.
Once you have resized the images to a lower resolution, you can include them in your app as you would normally. For example, you can add images to the res/drawable directory of your app’s project and reference them in your app’s layout files or code.
Remember that using lower-resolution images can affect the quality of your app’s user interface and visual design. It’s important to carefully test the resized images to ensure that they are still of acceptable quality and do not negatively impact your app’s user experience. Depending on your specific needs, you may also need to adjust your app’s layout or design to accommodate the smaller images.
Remember that these are general steps and may not necessarily reduce the size of your specific app. It’s always a good idea to consult the documentation or support resources for your particular app or development tools for more detailed instructions and advice.


![How to Get Udemy Premium Cookies in 2024[Daily Updated]](https://mytechnologyhub.com/wp-content/uploads/2023/12/Udemy-Premium.jpg)

